
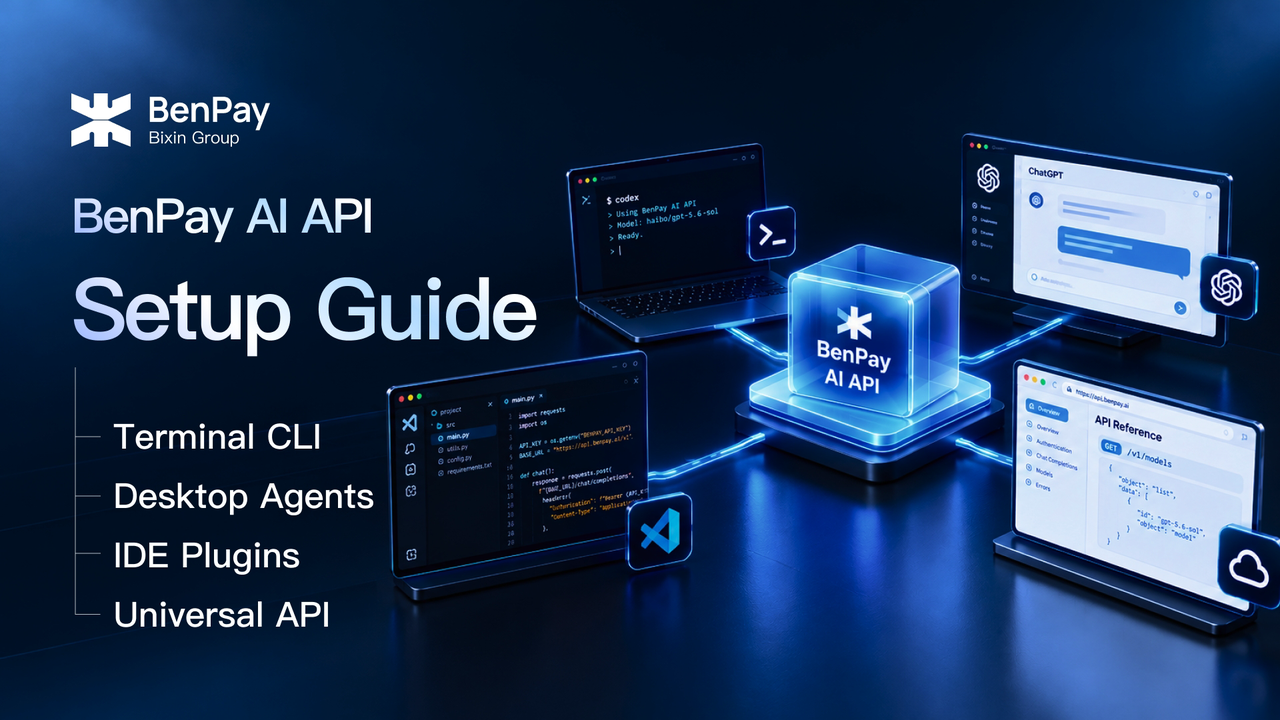
Need an AI API service but unsure where to start with configuration? BenPay AI API provides access to multiple AI models, with API keys and usage managed through one account and pay-as-you-go billing.
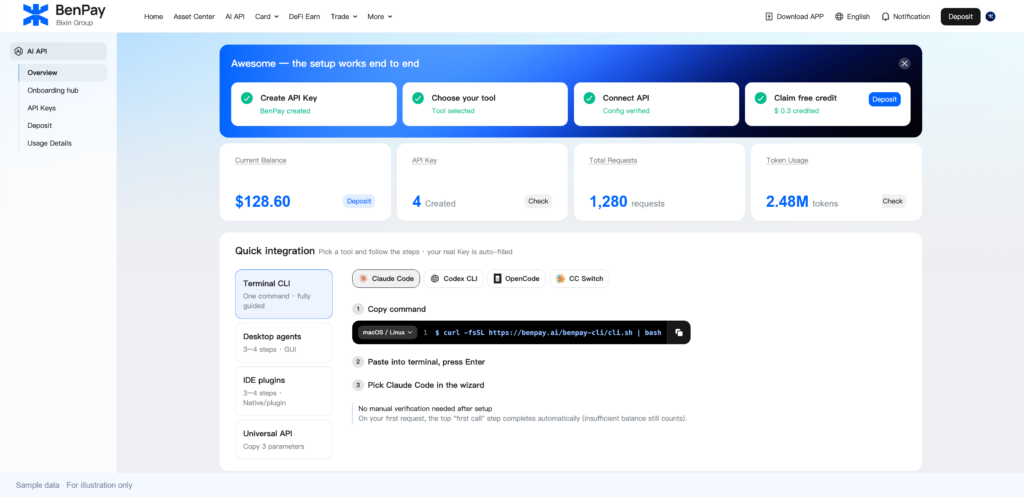
The redesigned setup page offers four integration options: Terminal CLI, Desktop Agents, IDE Plugins, and Universal API. Interactive wizards, step-by-step instructions, and walkthroughs reduce configuration guesswork and make initial setup easier. Simply choose the option that fits your tools or development needs.
How Does the New BenPay AI API Setup Experience Make Integration Easier?
Getting started with an AI API involves more than obtaining an API key. You also need to find your tool’s configuration settings, select the right API format, and enter the correct model details.
The redesigned BenPay AI API page organizes these tasks by tool and use case:
- Command-line wizards: Claude Code, Codex CLI, and OpenCode have interactive setup flows that reduce manual configuration.
- Step-by-step instructions: Desktop applications and IDE plugins have dedicated instructions showing where to configure the connection and which details to enter.
- Walkthroughs: Before configuring your tools, you can preview the authorization, configuration, and testing process.
- Manual configuration: Users familiar with APIs can copy the required parameters and connect their own code or compatible tools.
For first-time users, this means less time searching for instructions. Developers can find the parameters they need more quickly and continue working in their preferred environment.
Choose Your Integration Method
The four integration options cover different use cases. You do not need to configure all four.
| Integration category | Tools or use case | Main setup task |
|---|---|---|
| Terminal CLI | Claude Code, Codex CLI, OpenCode, plus a CC Switch option | The first three use a command-line wizard; CC Switch uses a configuration import flow |
| Desktop Agents | Claude Code Desktop, WorkBuddy, AutoClaw, Trae, Qoder | Enter connection details in each application’s settings |
| IDE Plugins | VS Code + Cline | Configure the API in Cline’s provider settings |
| Universal API | Your own code or another compatible tool | Set the Base URL, API key, and model ID |
If you already use one of these tools, choose its corresponding option. If you are building your own application, start with Universal API. Follow the current instructions for your selected tool.
For an explanation of how tools, APIs, and models relate to each other, read What Is a Unified AI API?.
![[Illustration 1: Four integration options | Alt: BenPay AI API integration through Terminal CLI, Desktop Agents, IDE Plugins, and Universal API]](https://www.benpay.com/blog/wp-content/uploads/2026/10/BenPay-AI-API-integration-through-Terminal-CLI-Desktop-Agents-IDE-Plugins-and-Universal-API-1024x576.png)
Terminal CLI: Set Up Claude Code, Codex CLI, and OpenCode
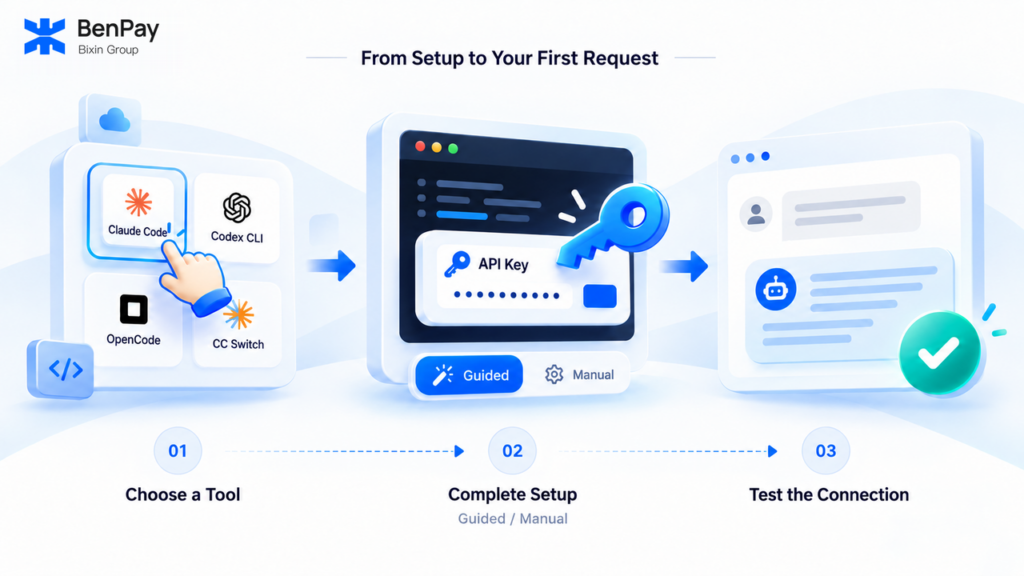
For users who want to work with AI coding tools in a terminal, BenPay provides a command-line setup wizard. Claude Code, Codex CLI, and OpenCode follow the same basic process:
- Select Terminal CLI in the quick integration section, then choose your tool.
- Select your operating system and copy the current command from the page.
- Paste the command into your terminal and press Enter.
- Select the corresponding tool in the interactive wizard and follow the authorization and configuration prompts.
- Review the configuration and test results, then launch your tool.
According to the page, the automated wizard creates a managed key after authorization, reducing the need to create and enter credentials manually. Users who prefer to configure their tools themselves can switch to the manual setup option.
If this is your first time, open the walkthrough to preview the process. The walkthrough explains the steps; you still need to complete the actual setup on your own computer.
CC Switch: Import a Configuration
CC Switch appears under Terminal CLI but uses a separate configuration import flow:
- Install a version of CC Switch that supports deeplink imports.
- Select the target client and default model in the corresponding BenPay panel.
- Create a key and generate an import link in Workspace.
- Return to CC Switch to confirm and enable the import.
If the import does not respond, check whether your version supports this feature or use the manual configuration instructions on the page.
Desktop Agents: Enter Connection Details in Your Application
If you prefer using AI through a graphical interface, explore the Desktop Agents category. It provides instructions for Claude Code Desktop, WorkBuddy, AutoClaw, Trae, and Qoder.
The settings differ between applications, so follow the instructions for your selected tool.
WorkBuddy, AutoClaw, Trae, and Qoder
The examples for these four applications provide three parameters: Base URL, API key, and model ID.
Install the application and complete any required sign-in. Select a request format and model in the BenPay setup panel, then open the tool’s configuration settings:
| Tool | Configuration path |
|---|---|
| WorkBuddy | Model selector → Configure custom model → Add model → Custom |
| AutoClaw | Settings → Model → Custom API |
| Trae | Settings → Models → Add API → OpenAI-compatible |
| Qoder | Settings → Models → Add API → OpenAI-compatible |
Enter the three parameters in their corresponding fields and save, then select the configured model in the application.
BenPay’s instructions for Trae and Qoder use their native custom API settings, without an additional plugin. Menu labels may change as applications are updated, so refer to the current integration instructions.
Claude Code Desktop: Configure a Gateway
Here, Claude Code Desktop refers to the Code tab in the Claude desktop application.
BenPay’s instructions use the Gateway configuration under third-party inference settings. This requires entering a gateway address and API key and configuring a model. The Gateway base URL provided on the page is:
This setup differs from the terminal version. Even if Claude Code CLI is already configured, follow the desktop instructions separately. See the Claude Code Desktop section on the integration page for the current menus, authentication settings, and application version requirements.
IDE Plugins: Configure Cline in VS Code
If you want to use AI within your code editor, choose IDE Plugins. BenPay’s VS Code integration instructions use the Cline extension:
- Install VS Code, then search for and install Cline in the Extensions panel.
- Prepare the Base URL, API key, and model ID from BenPay’s IDE integration panel.
- Open the Cline sidebar → Settings and set API Provider to OpenAI Compatible.
- Enter the three parameters, using the exact model ID provided on the page.
- Click Done to save and select the configuration in the chat interface.
Enter the API connection details in Cline’s settings. Once configured, you can start using the selected model within your editor for tasks such as explaining code.
Universal API: Connect Your Code or a Compatible Tool
If you are building an application or using a tool that supports custom API connections, choose Universal API to obtain the three required parameters.
| Parameter | What it means | What to check |
|---|---|---|
| Base URL | The base address used for requests | It matches the API format required by your tool |
| API key | The credential used to authenticate requests | Use your own BenPay key |
| Model ID | The exact identifier selecting a model | Copy it from the current model list |
The page provides two API base addresses:
- OpenAI-compatible:
https://api.benpay.ai/openai/v1 - Anthropic-compatible:
https://api.benpay.ai/anthropic
First, identify the request format your tool or code requires. Choose the matching address and a compatible model, then enter the parameters in your configuration file or settings.
A Base URL is the API’s base address. Whether you need to append a specific request path depends on your code or tool. If an existing project uses a compatible format, you may be able to reuse parts of its request structure while checking authentication, model parameters, and required features.
Make Your First Request: Save Your Settings and Test the Connection
After completing your selected setup flow, send a short message in your tool, such as “Reply only with OK,” and confirm that you receive a normal response. If you are connecting through code, run a minimal request and check the result.
When creating an API key manually, save its full value. The page notes that the complete key is displayed only once after creation. Keep it out of public articles and screenshots.
Copy the exact model ID shown on the page. Do not substitute the model’s display name or include discount text from the dropdown.
If Your First Request Fails, Check These Five Things
| Check | What to confirm |
|---|---|
| API format | The tool’s provider settings match the endpoint format |
| Base URL | The address is correct and does not contain a duplicated path |
| API key | The key is correct, remains valid, and is being used by the current configuration |
| Model ID | The identifier is exact and suitable for the selected interface |
| Configuration and account status | Settings are saved and active, any required restart is complete, and usable balance or trial credit is available |
Use the tool’s error message to guide these checks. After a basic text request succeeds, confirm that the selected model and interface support any additional capabilities you need, such as tool calling or image input.
Review Requests and Usage in Workspace
After your first request, open Workspace to review request and usage records. Use separate API keys when you need to distinguish projects and track their costs more easily.
BenPay AI API uses usage-based billing. Refer to the current pricing table for your selected model and channel. For more detail about input, output, and cache usage, read the AI API Pricing and Token Cost Guide.
Eligibility and availability for free trial credits are subject to the information shown on the page.
BenPay AI API Setup FAQ
Do I have to use a terminal?
No. Desktop Agents and IDE Plugins have their own configuration flows. Your code or another compatible tool can use Universal API. Choose the option that fits your use case.
Does every integration method require a manually created key?
Not necessarily. The automated CLI wizard supports creating a managed key after authorization. For manual configuration and other methods, prepare your key according to the page’s instructions.
Do Claude Code’s terminal and desktop versions share the same configuration?
The two flows described here differ. The terminal version uses the CLI wizard or manual configuration, while the desktop version uses the Gateway form under third-party inference settings. Follow the corresponding instructions for each.
Can I use a tool that is not listed?
Check whether it supports a custom Base URL and an OpenAI-compatible or Anthropic-compatible interface, then assess whether Universal API fits its requirements. Interface compatibility is one consideration; specific features still need to be checked against the tool’s and model’s requirements.
Choose Your Setup Path and Get Started with BenPay AI API
The redesigned BenPay AI API setup experience reduces the guesswork of getting connected through interactive wizards and tool-specific instructions. Whether you want to connect an AI tool or add model access to your own application, choose the option that fits your needs.
Visit BenPay AI API, follow the relevant guide, and make your first request.